Tutorial: TimThumb Thumbnail Generation with Arthemia
If you still have problems getting the thumbnail automatic generation working, please read this tutorial. I spent a lot of my time creating this tutorial, including screen shots for some significant steps, and adding narrative text to each image. Please consider reading the whole instruction again, again, and again because I found out that there is 90% possibility that you missed one spot and there are many occurrences one say that he/she did not missed anything but ended up saying “Ah, yeah, I forgot that one.” :D
The CHMOD 777
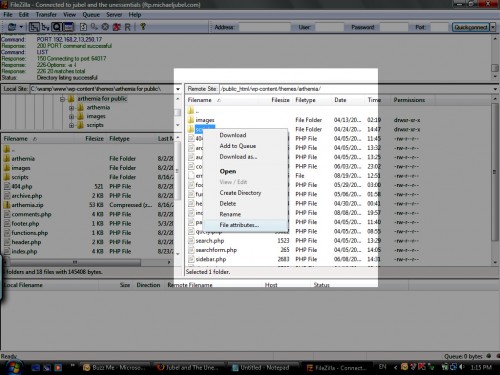
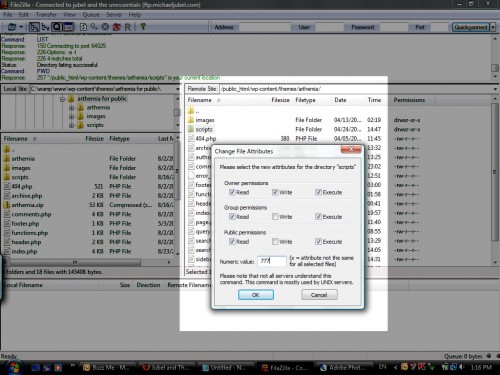
Upload and activate the Arthemia theme. Then, the first step is to make the scripts and cache folder writable. You can either try ‘777’ writable or ‘755’ writable. Some web hosting company prevent you making any folder ‘777’ writable due to some security reasons. But, I suggest you to try with ‘777’ writable first. I use FileZilla to do the FTP work because it is free and has a lot of features. To make the folders writable, simply right click the folder name and select ‘File Attributes’ and a dialog box will show up.
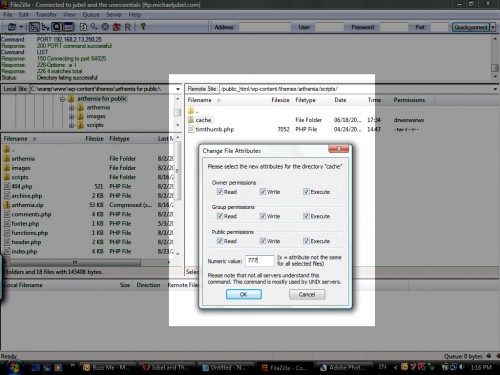
You can tick all the attributes there, consider it a finger exercise, or directly type 777 as the folder attribute. Do this to both scripts and cache folder.
You’re done with FTP work and may continue to the image uploading procedure.
Uploading an image
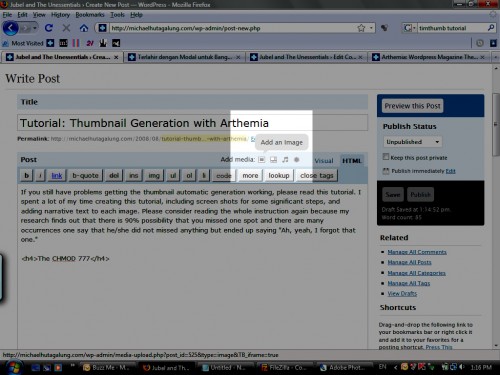
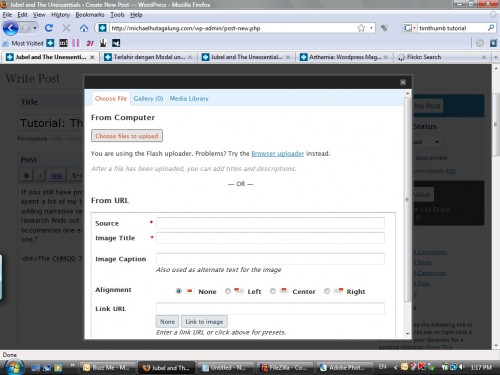
To upload image, you can use the built-in Add Image WP feature. In the post editing page, notice the Add media icons just below your post title and permalink. Click “Add Image” and an image uploading page will show up.
Upload any image that you like, preferably the properly sized one (for example: 300×300 pixel or bigger for Arthemia theme).
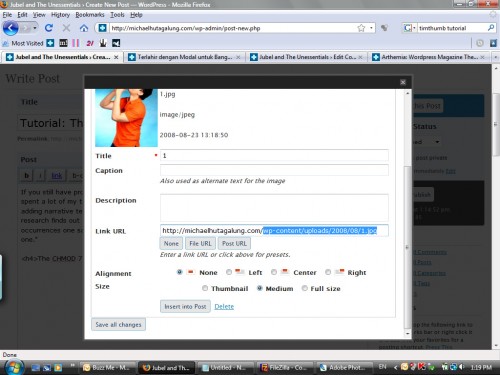
After the image is uploaded, you can see the image location from the ‘Link URL’ field. In this tutorial, it is: http://michaelhutagalung.com/wp-content/uploads/2008/08/1.jpg. Values may vary depending on your blog settings. One may have the time-structured folder while others may not. Copy that value but remember to get rid of your blog home page location. In my case, the final value will be wp-content/uploads/2008/08/1.jpg.
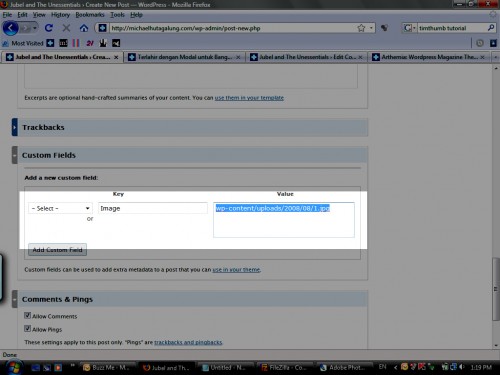
Then, close the image uploading page and you do not need to clik ‘Insert to Post’ button if you do not want to. When you’re back in the post editing page, scroll down until you find “Custom Fields”. Make a new Custom Field with “Image” as the key and the image location as the “Value”.
You’re done. Please note that there is no support provided for Arthemia Free. Support is only provided for Arthemia Premium. If you have any problem with Arthemia Premium, please submit a support ticket to http://colorlabsproject.com/support.
—
Whether you want to pass CCNA voice or interested in CCNA wireless, our CCNA security training contains everything you need for exam prep.

